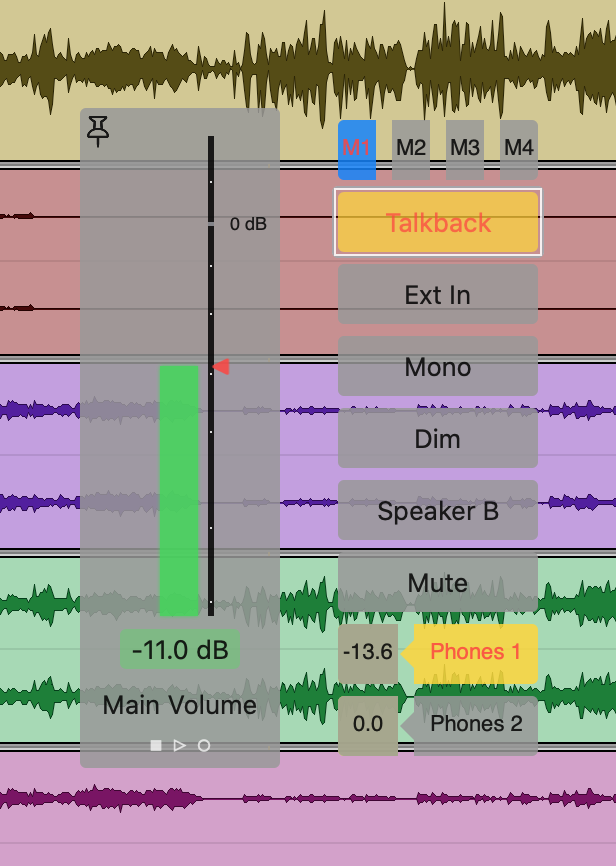
ControlPilot HUD
This is the HUD with all incoming Control Room information.
Up to 4 Phones indicators and the ‘Speaker B’ indicator appear according to their assignment in TotalMix.
Mute Groups shown as M1 – M4.
When the HUD is ‘pinned’, it stays on screen permanently.
Hover the HUD with your mouse pointer to hide it!
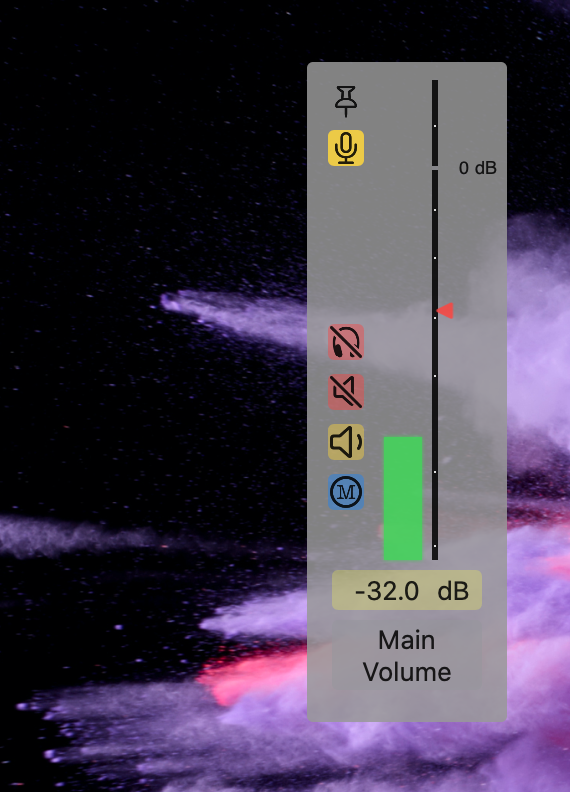
HUD Layout ‘Compact’
In this smaller layout, indicators are shown as icons when active.
Compact displays all indications that the full display does, except for no Phones 3 & 4 mutes and only one Mute Group.
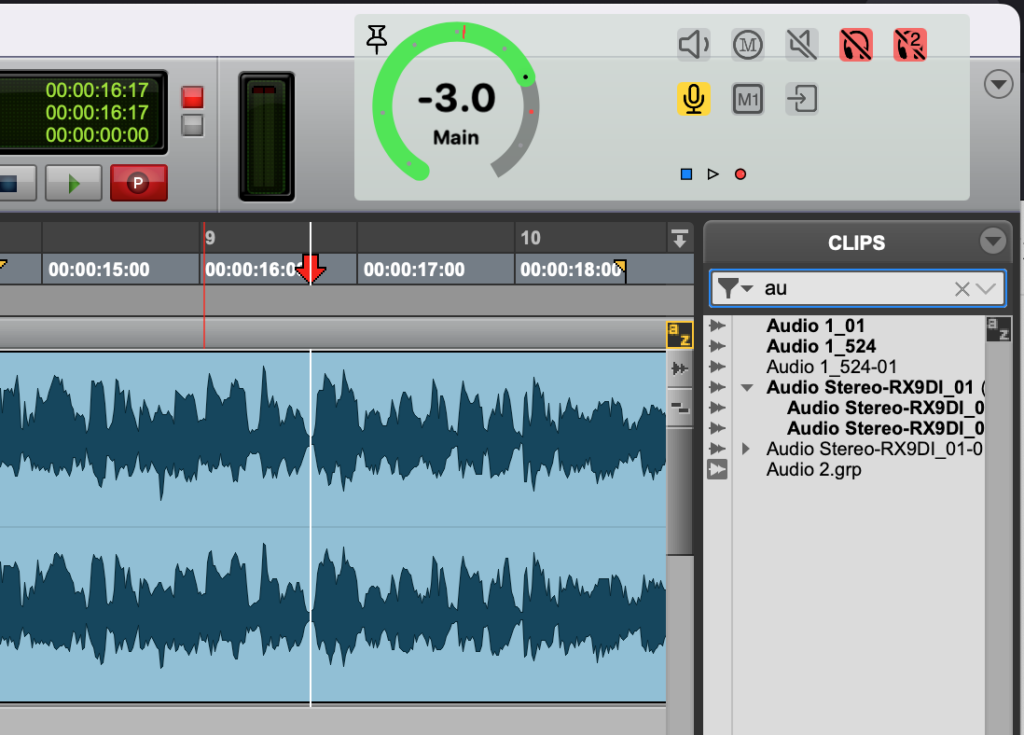
HUD Layout ‘Flat’
Another small layout made to fill some empty space in a popular DAW.
With the cute circular volume bar.
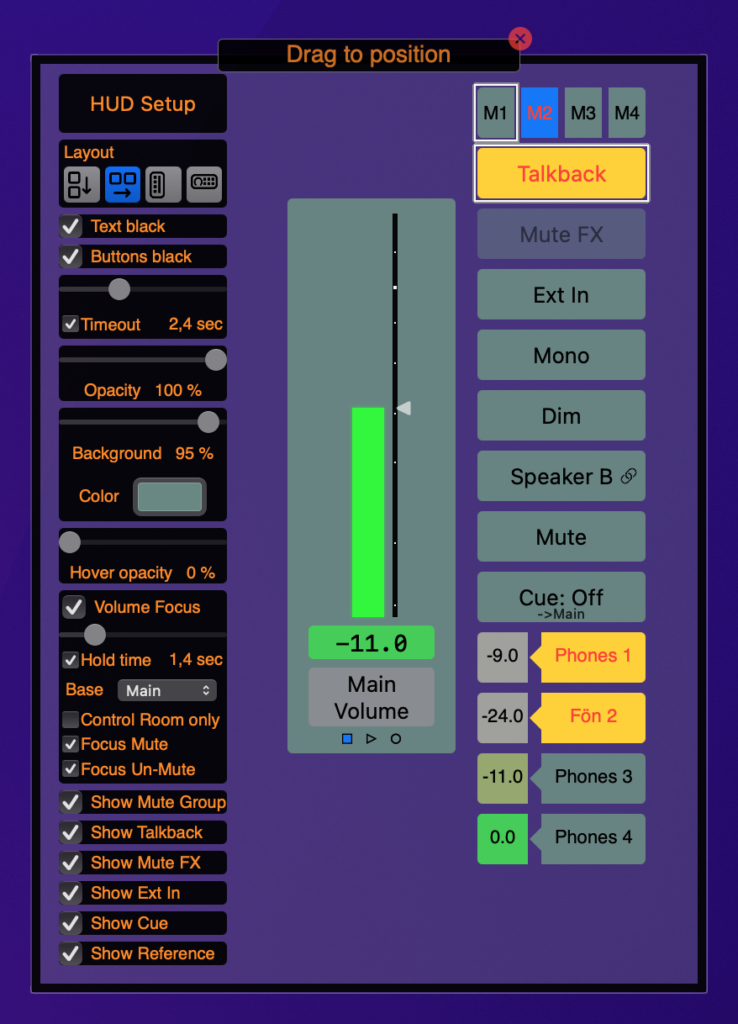
HUD in Setup Mode
On the menu bar icon, click right to toggle Setup mode. Alternatively, click Setup in the menu bar popover.
Here you adjust all appearance and timing related settings.
Drag the HUD to the screen position of your choice.
Choose from the 4 layout options.
Adjust HUD Timeout, overall and background Opacities, background color, hover fade strength, text color, Volume Focus behavior etc.
You can also hide some of the indicators you don’t need.
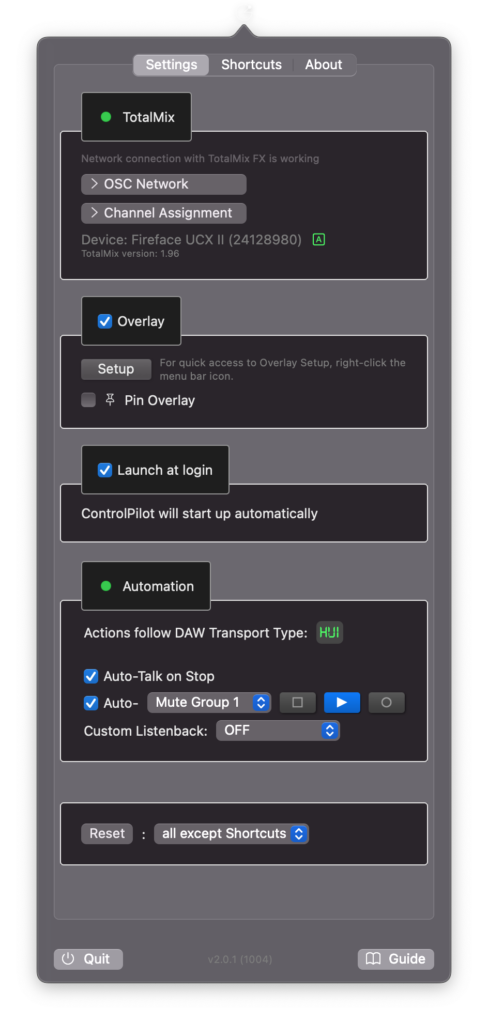
Settings
Adjust ControlPilot settings in this dropdown window. On the menu bar icon, click left to open the dropdown.
TotalMix: A green light show when communication with TotalMix is correctly set up. If not:
- OSC Network settings: Here you set the network ports reflecting to what you set in TotalMix > Options > Settings > OSC.
- Channel assignment: Here you can adjust the channel mappings.
HUD Overlay: Use the checkbox to toggle the overlay on or off.
Click on Setup to put the overlay in setup mode and make all GUI related settings.
Choose Pin Overlay to have the overlay permanently visible.
Automations: Both currently available automation methods need a setup of a MIDI transport protocol to get transport triggers from your DAW.
- Auto-Talk: If a talkback microphone is configured in TotalMix, ControlPilot can switch it on in Stop and off in Play.
- Auto-Mute while Transport: Lets you select a TotalMix Mute Group and the transport states where it switches on. A use case for this is a near-zero latency headphone monitoring or a listenback mic.
